Looking for a small kitchen storage solution for your fruits and vegetables? Try out this DIY fruit and veggie bin I created and customized with my Cricut Maker Machine.
Or if you prefer reading and seeing pictures, I’ve added the entire episode transcript below (with some modifications for clarity) along with some images to highlight the main steps.
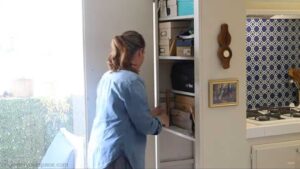
It’s spring cleaning time over here and today I’m doing some serious kitchen pantry organization by building a custom cabinet organizer for this kitchen cabinet. I had been using this kitchen cabinet to store some of my project supplies, but I knew that there was a better, more efficient way that I could use that space to also make room for some fruit and vegetable storage. It took quite a bit of time to sift through all of this stuff and purge all the things I didn’t need anymore. Then to consolidate everything that was left to fit in the top half of the cabinet.
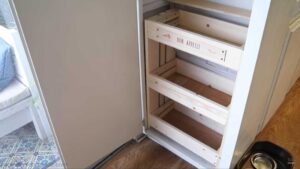
That leaves me the bottom half for my fruit and vegetable storage, and luckily, the shelves weren’t even screwed in so it was easy to remove them to make room for my custom storage bins. I didn’t want to alter the inside of the cabinet because I’m a renter, so I opted instead to build a standalone storage unit that I could just slide into the cabinet, and then easily take out of the cabinet when I’m ready to move out.
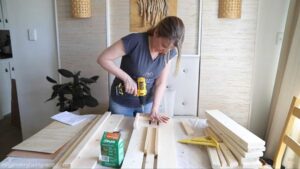
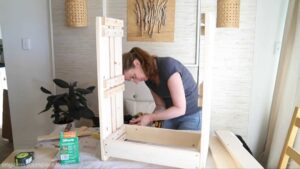
I designed it to be really easy to assemble in my makeshift dining room workshop with only a drill and some hand tools. I also wanted to reuse the materials that I already had. That’s why I’m using three different boards to build the size of the unit. The spacing in between the boards is a bit of a design element, but it’s also a way to get the depth that I wanted using the wood that I had.
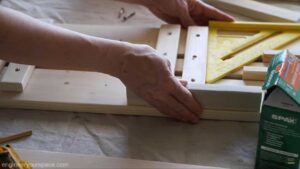
Spacers are really helpful to make sure that the gap is the same everywhere. I also use spacers at the front and the back of where the supports go to make sure that there’s enough room for the front and the back of the bins. A speed square is also really helpful to make sure that the boards are straight and square.
I’m currently working on a book where I will go into a lot more detail about all the tools that I use, how I managed to build everything in my dining room, and it’s going to include a ton of practical and useful information to help you engineer your space into a home that you love. If this is something that you’re interested in seeing come to life, and would like to be part of, I’m actually sharing the book writing process on Patreon. I’m sharing book excerpts as I’m writing chapters and sections of the book. I’m also getting input from my patrons on the content to include and there’s also lots of other perks. If you’re interested in joining my Patreon family, click here.

You would typically drill pilot holes before putting in the screws to prevent the wood from splitting. However, I’m skipping this step because I’m using SPAX screws which are self drilling. I’m also choosing to not use wood glue because I want to be able to take this apart and reuse the wood if I need something different in the future. I haven’t decided yet what finish to give the wood but in the meantime, I had to see how it looked. My kitchen cabinet wasn’t exactly square, but luckily my storage bins were able to slide in easily. I really love the way this looks, but I felt like it was just missing a bit of character.
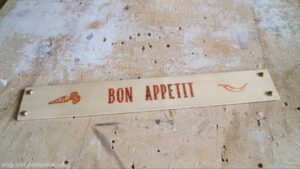
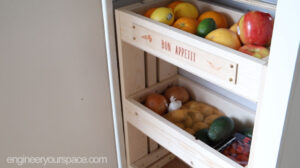
So I made this sign with a design that I made with my Cricut Maker Machine and infusible ink to replicate the technique of wood branding.
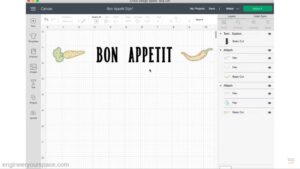
I started by looking for cut and draw images in the Cricut Design Space and then imported the ones that I liked into my project. I also resized the images to fit on my piece of wood. Next, I wanted to add some text,. There’s a lot of options for fonts but I settled on the font Easton, which I then made bold to make the letters stand out a bit more. The letters are going to be cut out of infusible ink transfer sheets while the vegetables will be drawn with an infusible ink pen and then cut. So to deal with the two different types of operations I hit the text layer by clicking on the eye icon so that I could just draw and cut the vegetables. Whenever you’re dealing with infusible ink you need to mirror the image so that you get it to look like you want on your actual material that you’re putting this on.
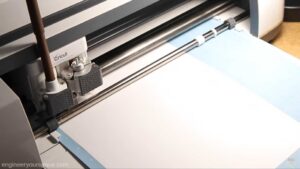
I selected laser paper which I placed on a light grip mat and I loaded the tawny brown infusible ink pen. It’s the color that comes the closest to mimicking the look of burnt wood. I wanted to use this pen for the entire drawing so I just ignored all the prompts to switch out the pen for a different color. After the shapes are drawn and cut out, I used a weeding tool to remove them from the mat. They are small and delicate so I was careful to pull them off slowly. Next, I unhid the text layer and hid the vegetable image layer to be able to cut the letters.
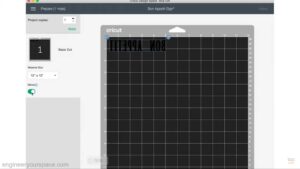
Again, it’s very important to mirror the image before cutting the letters.
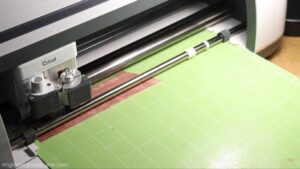
For the letters I chose to use this distressed rustic and fusible ink transfer sheet. And for this material I used a standard grip mat. Once the letters were cut out, I use my weeding tool to remove the excess material that I flipped it over and centered the design sticky side down onto the wood board.
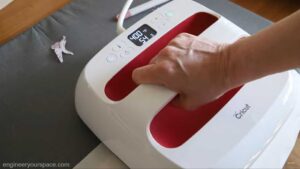
I covered the letters with butcher paper and applied heat with the Cricut Easy Press. I really like this Easy Press because you can be very precise with the temperature and time settings. For this project I set it at 400 Fahrenheit and 60 seconds. One thing that’s very important to have a good result is to not move the Easy Press or the heat source while it’s being applied.
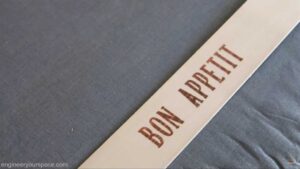
It’s really cool to see that the infusible ink is completely embedded into the wood and doesn’t even come off when you do some sanding.
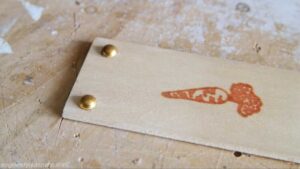
I used matte polyurethane to seal the wood and the last touch was adding some faux antique gold gems that I made with some mod podge and antique wax.
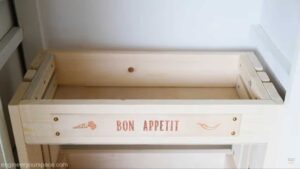
I’m really happy with the end result and how easy it was to make this sign with my Cricut Maker Machine and infusible ink. It’s really a versatile machine that allows you to do so many things. This sign is also very light, which makes it easy to install with just double sided tape. And voila my fruits and veggies bins are done.
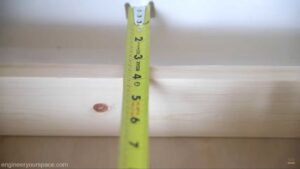
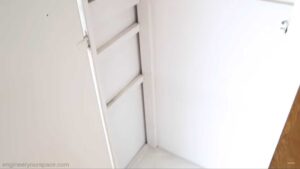
I did notice that there was about three inches of space at the back of the bins and I hate to see space going to waste.
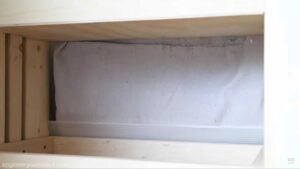
So I MacGyvered this contraption to hold my canvas cloths in the back of the bins, I can easily access it from the top or from the front. And I was also able to put my extra canvas cloth behind the bottom bin.
I still have to figure out what kind of finish I want to use on the wood but I couldn’t wait to see all the fruits and veggies in there.


Love all your projects!
Thanks!
Love all your projects!
Love the back splash and veggie storage. Great ideas!
Thank you!