Make this very simple double sided frame for pictures – no power tools needed and it’s easy to customize! It also makes the perfect gift for that special someone.
If you prefer reading and seeing pictures, I’ve added the entire episode transcript below (with some modifications for clarity) along with some images to highlight the main steps.
In today’s episode, I’m going to show you how to make a really easy double sided frame that works vertically, horizontally, and that you can also hang up.
What frames for pictures I used
For this project you’ll need two identical frames. I got these at IKEA for $3. You’ll also need a ¾” of an inch thick square wood dowel, wood sticks or popsicle sticks, stick on Velcro, and iron on wood edging 2” wide and ¾” of an inch wide. Of course you’ll need some photos. I had the photos that I wanted to use printed through the Walgreens Photo Center Online. I was able to pick up my pictures within an hour at the store, which was really convenient.

What materials you’ll need to make this DIY double sided frame
Here’s the list of materials you’ll need:
2 identical picture frames for 4”x6” photos: http://bit.ly/1V7KBJw
3/4” square wood dowel (2 x 10” long): http://amzn.to/1Ei5c9W
3/4” wide wood veneer edging (birch): http://amzn.to/1PQEuX2
2” wide wood veneer edging (birch): http://amzn.to/1fEcBVa
Velcro dots: http://amzn.to/1JWIYfZ
6” long wood sticks or popsicle sticks: http://amzn.to/1Ei4MR5
And here are the tools and supplies you’ll need:
Wood glue: http://amzn.to/1MRIGaI
Sand paper: http://amzn.to/1NSnuOR
Bar clamps: http://amzn.to/1hZsoQ3
Staple gun: http://amzn.to/1MLcMuX
Speed square: http://amzn.to/1JtVHjC
Miter box and saw (optional): http://amzn.to/1JhtpPz
Utility knife: http://amzn.to/1V7INjQ
Iron: http://amzn.to/1hZsYNU
Let’s start with the base of the double sided picture frame
The first thing to do for this project is to build the base that holds the frames. I cut the wood dowel with a miter box and saw, but you could also have that cut at the hardware store. Mark the center of the dowels and then place the narrow side of the frame in the middle of the dowel and mark the inside edges of the frame. Staple the wood sticks on the inside of the middle lines and lined up at the top and bottom edges. The wood sticks may split at the ends but that’s okay. Then you’ll want to hammer the staples to make sure that they’re completely in.

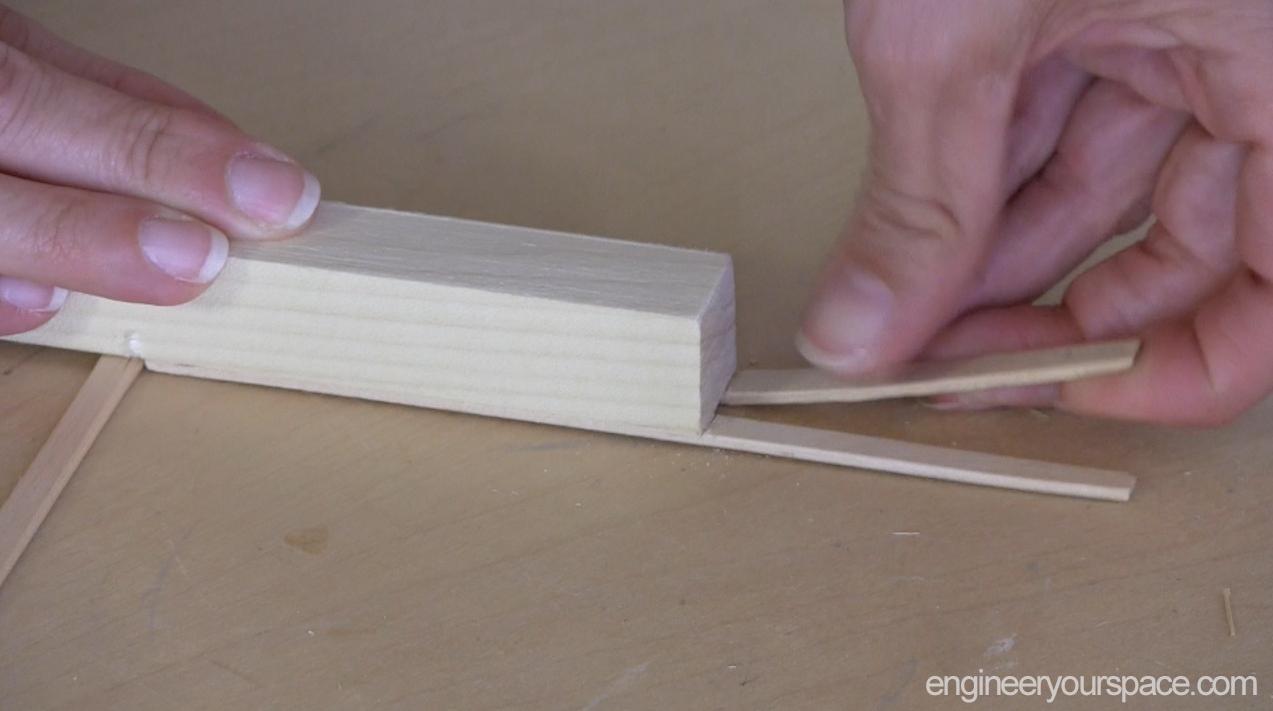
Next, trim off the sticks at the end by lightly scoring them with a utility knife and snapping them off. Place the dowel with the sticks at the edge of the 2” edging and mark the location of the vertical sticks using a pencil. Using a utility knife, carve out enough space for the sticks to go through and place the edging aside for now.
To complete the base structure, add wood glue where the sticks are along the base. Line it up with the other dowel piece and use bar clamps to hold them together. Making sure to wipe off any excess glue Next, glue ¾” inch edging all the way around the four sides of the base using an iron. Then glue the 2” edging to the top and bottom the same way. You can cut off any extra edging with the utility knife. Then you’ll want to smooth out the edges with sandpaper.

Finishing touches for the double sided picture frame
Now to finish it, I chose to use a white wax, but you could also paint it or even stain it to match your frame. To make the double sided frames, first put in your pictures, then simply add Velcro to the four corners of the frame, line them up, and press them together. Then all you have to do is slide the frames over the base and you can have a vertical or horizontal double sided frame.

Looking for a hanging option for your double sided picture frame?
You can also make this a hanging frame by stapling a wood stick at the top of one of the frames and drilling a small hole in the middle so that it can hang from a hook, like I did here in my office room divider.

Image from my office room divider hanging double picture frame.
I love how quick and easy this project is to make and I can’t wait to make more to give as gifts.


0 Comments