There are many things I wish I had known about earlier in my DIY journey, like the existence of the speed square and all the ways it can be used to make building something easier.
So what is a speed square?
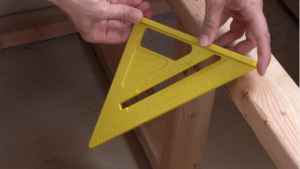
A speed square is a very inexpensive tool ($5-50) that takes up hardly any space – it is actually a triangle that has many markings and a lip along one edge. It is very unassuming yet t is so useful for so many projects that there’s hardly anything that I build now where I don’t use it in some way. I will highlight a few of the ways that you can use a speed square, but keep in mind that there’s also many, many, other ways the speed square can be used in home building and carpentry.
How do you use a speed square?
I will highlight a few of the ways that I’ve used a speed square, but keep in mind that there’s also many, many, other ways the speed square can be used in home building and carpentry.
Drawing a line at different angles
When building most things out of wood boards, marking the measurement where to make cuts is almost always something that I do. And since I cut a lot of wood with a hand saw, I can’t rely on a miter saw to set the angle.
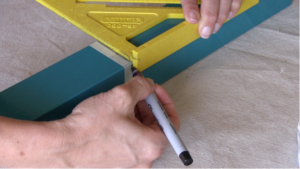
To draw a perfect 90 degree angle from the edge of the wood board, simply line up the side of the speed square that has a lip so it’s right against the edge of the side of the material and then you can draw your 90 degree line.
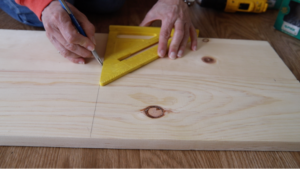
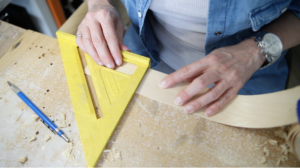
EYS tip: when cutting several boards the same length, I like to mark all the boards at the same time. To do this, I use a straightedge to make sure all the boards are lined up, then I mark the measurement across all the boards using the speed square to transfer the measurement from one board to another.
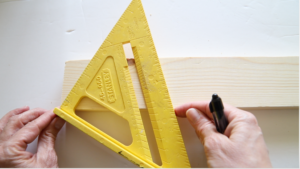
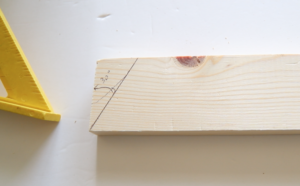
The speed square also has a built-in 45 degree angle due to its shape, and it also has angles marked along the 45 degree edge. You can mark the angle directly from the 45 degree side, or you can transfer the angle to the edge of a board by rotating the speed square around the pivot point at the corner, until the desired angle is lined up with the edge of the wood board. In the image below, the angle I’m marking is 30 degrees.
Scribing lines across the length of a board
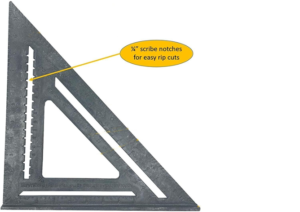
Some speed squares also have built in notches that make is easy to scribe a straight line down a board – one example of where this is helpful is when you want to mark the location of a board that you’re screwing into, or you want to mark a line so that all your screws are lined up in a straight line.
Keeping things square
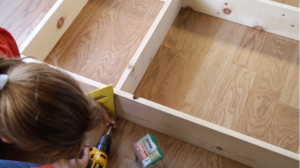
Anytime I have to join 2 wood boards together, I like to use my speed square to make sure that they are at 90 degrees. I often hold the speed square with one hand while attaching them together with screws. It may require some practice and patience to get good at this but it’s a skill that you will use time and time again.
I don’t tend to take the time to do this, but another way that’s a bit easier when you’re starting out is to use a bar clamp to attach the speed square to one of the boards, essentially making a corner clamp.
Aligning screws
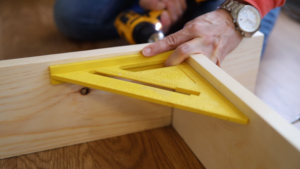
When you’re drilling pilot holes or putting screws into the narrow side of a wood board that’s ¾”, it’s easy to be slightly off and miss the board or have the screw go in at an angle and come out of one side. Marking the edges of the board as a guide is helpful but instead you can also use the speed square as a guide. This also helps to line up the screws for a cleaner look, all without having to mark the wood.
Transferring measurements
Sometimes it’s important to have the exact same measurement on four sides of something – you would think that using a tape measure and marking the same measurement would be precise, but it’s easy to be slightly off. Most of the time this isn’t an issue but when I had to cut the legs of an IKEA LACK table, I wanted to make sure that all 4 sides were cut perfectly straight at the exact same location. I used the speed square to draw the first line on one side, and then used the lip of the speed square to transfer the measurement.
 .
. 
EYS Tip: to avoid making pencil marks on what you’re cutting, put some masking tape along the cut line and mark your measurement on that. This will also have the added benefit of protecting the finish of what you’re cutting and minimizing tear out along the cut line.
Making straight cuts with a utility knife
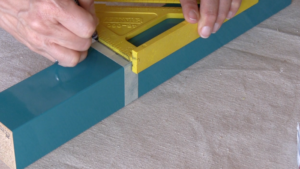
Another way you can use a speed square is to make straight cuts when you’re cutting wood edging or some other material with a utility knife. You place the speed square against the edge of a piece of plywood, line up what you’re cutting along the same edge, and then line up the speed square where you want to make the cut.
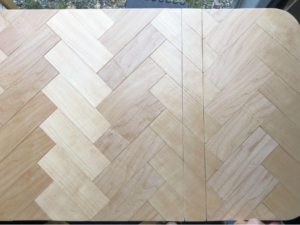
This method ensures that all your cuts are exactly at 90 degrees, which is important for certain projects, like this table top Icovered with 2” wood edging pieces in a chevron pattern. To make this work, all the cuts had to be very precise.
With all the ways you can use a speed square that I mentioned, have I convinced you yet that you should add a speed square to your tool box? I know I couldn’t DIY without it, so I hope you will give it a try. At only a few dollars, I know you will find it useful and a life saver, no matter what DIY project you’re working on!


0 Comments