Looking for inspiration on how to decorate an entryway? I decided to give my entryway a makeover, I covered up an awkwardly placed AC unit, created storage space, vamped up my old vinyl floor, replaced vertical blinds with curtains, and more! Take a look at how I did all this in the video below.
Or if you prefer reading and seeing pictures, I’ve added the entire episode transcript below (with some modifications for clarity and flow) along with some images to highlight the main steps.
Before I get started, I just wanted to share with you that we can now connect on Patreon. I’m really excited about this because it’s going to give us a chance to connect on a more personal level. Also, by becoming a patron of Engineer Your Space, you not only help support this channel, you will also get access to exclusive perks like detailed plans on the projects that you see, exclusive content you won’t see anywhere else, and live Q&A sessions with me. So if you’re interested in joining the EYS family, I’ll have a link in the video description below so you can find out more details.
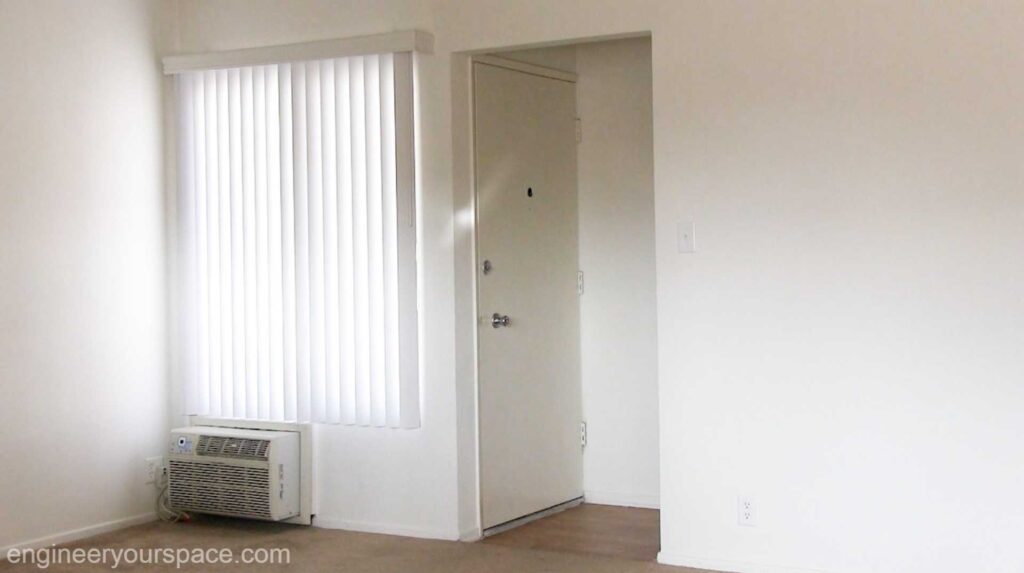
Alright, now back to this makeover. This is what the entrance of my apartment looked like when I first moved in. I’m not a fan of the vertical blinds and the view from this window isn’t exactly pretty either. Plus there was this awkwardly placed AC unit, it’s quite the eyesore, so I designed a custom piece of furniture to hide it when I’m not using it.
Since I don’t have a workshop or a dedicated space to build. I had all the wood cut at the hardware store. My design was simple enough to put together with just a drill and some basic hand tools. I made a video showing all the details of this build, which I’ll link in the description below. The key feature to this entire thing is the front panel, which is simply held in place at the bottom with some brackets and some magnets at the top, so it’s really easy to take off whenever I need to use the AC unit.
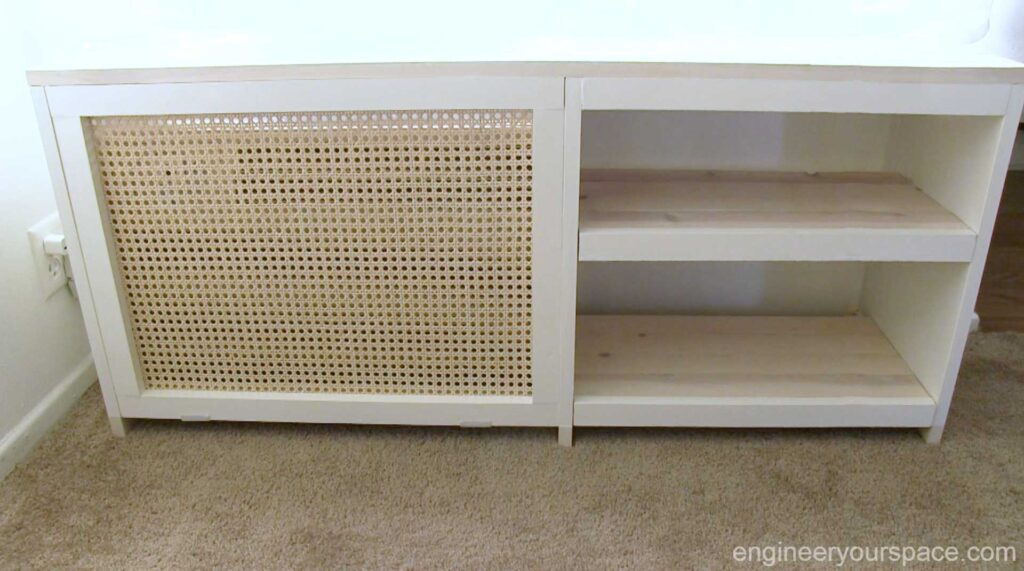
I’m so glad that I also incorporated shoe storage, including this recent addition of the magazine holder flip-flop storage. Having everything off the floor just really helps keep visual clutter to a minimum.

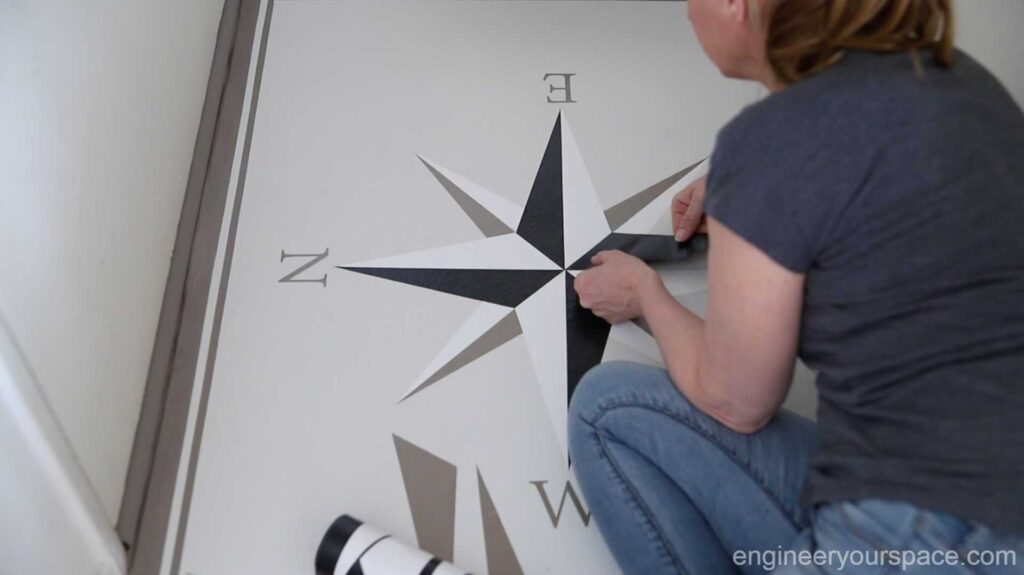
The old vinyl floor is another eyesore that got a renter friendly makeover recently. I covered it up with the Ram Board that I painted, Ram Board is a really thick cardboard that’s typically used to protect floors during construction. To make this renter-friendly, I used removable double-sided tape to attach the Ram Board to the vinyl floor. The compass rose design is something that I made with my Cricut machine, which is sort of like a printer, except that instead of printing, it cuts out your designs with very precise blades. You can cut in all kinds of materials and I’m really happy that I used this machine instead of painting because I’m not so sure that my design would have come out as perfect as it did.
I was concerned about the surface getting chipped and worn since this is in a very high traffic area. So I added two coats of polyurethane to protect it. After four months of having this floor it still looks great and it’s also been really easy to keep clean. You’ll find the link to the video that goes into detail about this project here.
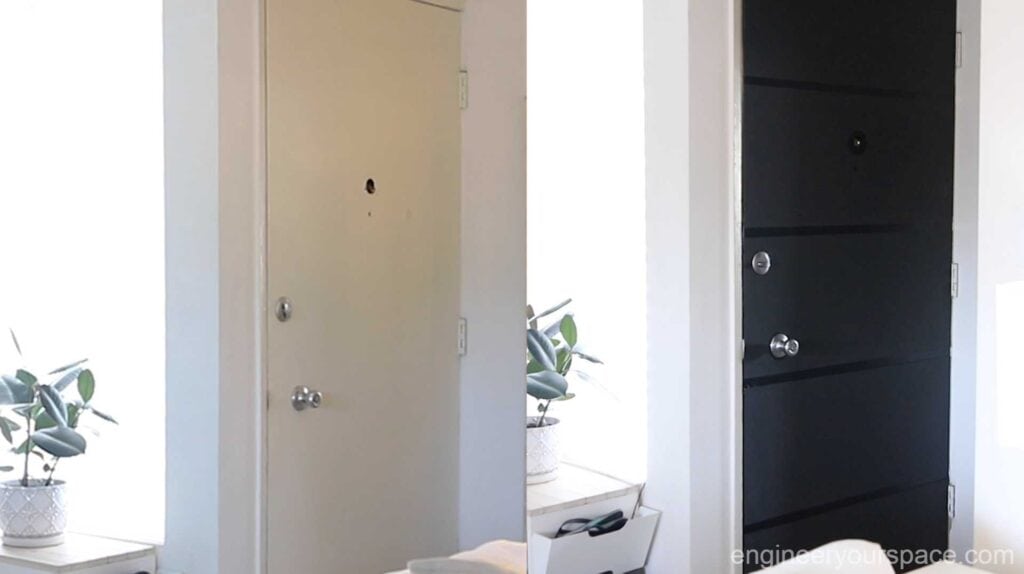
The next project was actually inspired by the black accent in the compass rose, it gave me this crazy idea to make the inside of my front door black to add some drama and style to this space. I also wanted to add depth and architectural interest to the door. So instead of painting it, I decided to do the same wall treatment that I did in my bedroom, using contact paper and RAM board to create stripes with different textures. Since I have black matte paint leftover from the bedroom project, that’s what I use to paint the Ram Board. I also use the same removable double-sided tape to attach the cardboard to the door. Because the door has a shiny enamel finish, I thought that it would be fine to stick the tape directly onto the door, but more on that in a bit.
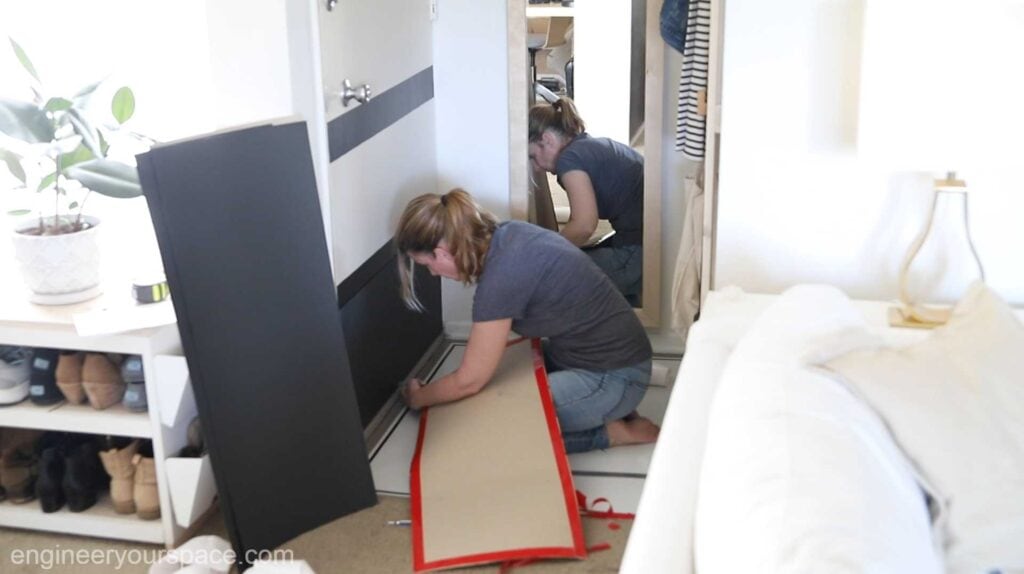
The solid stripes are fairly easy to install, but the middle stripes were a bit more challenging because of the door hardware. It took me a couple of tries and some adjustments to get the measurements right, I eventually got it all to fit. One of the downsides of using paint with a matte finish is that it got a lot of scuff marks from handling it during the installation. So after touching up the paint, I thought it would be a good idea to protect the cardboard with matte polyurethane, unfortunately doing that caused the cardboard to bubble in many spots. I had to take off the stripes to smooth them out again. When I did that, big sheets of paint came right off the door.
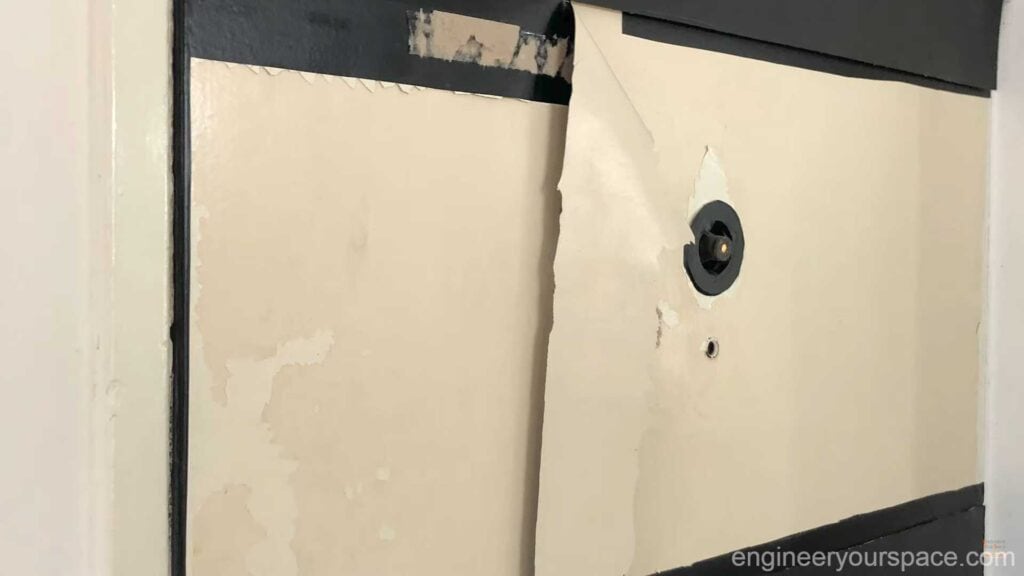
I’m thinking that this happened due to a combination of this door having been painted many times over without proper surface preparation. Also, because I put the double-sided tape directly onto the door. Word of caution that this can happen, especially if it’s an old door. Now even though this didn’t go as planned and I’m going to have to repaint the door when I move out, I absolutely love the way the black door looks. I’m really curious to know which door you prefer. So let me know in the comments which version of the door you prefer.
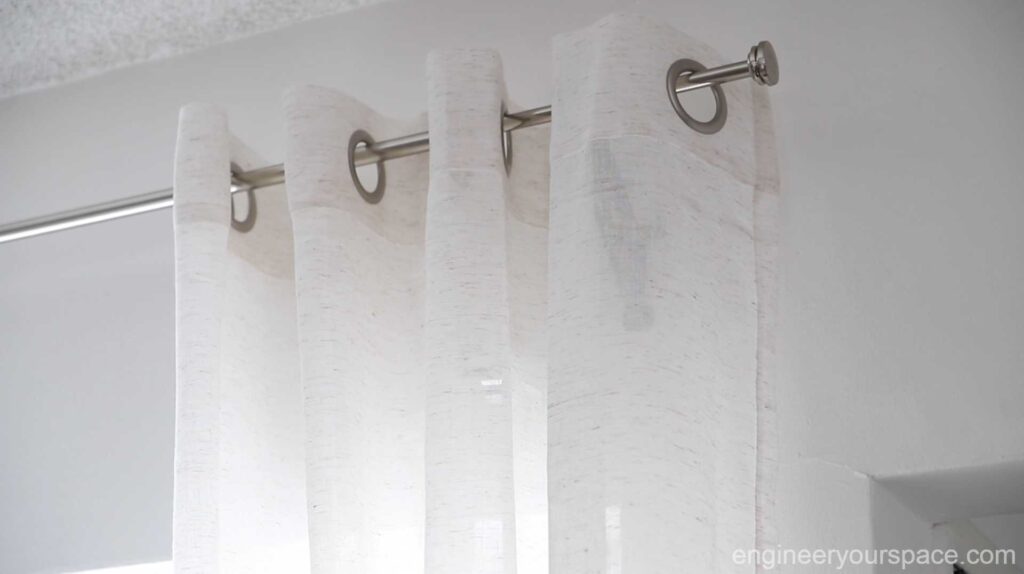
With the door finished, I turned my attention to the window. I had already replaced the vertical blinds with inexpensive accordion paper blinds. They’re not fancy, but they give me the privacy that I need while still letting the light in. The one thing missing was curtains to dress up the window. To install the curtain rod I thought about using No-No brackets that go directly on the vertical blind track. I did this in my bedroom and it’s a great option to avoid making holes in the wall. This time I wanted to hang my curtains higher up above the window, because doing that actually makes the window look a lot taller.
Another trick is to extend the curtain rod on either side of the window and that will make it look wider.
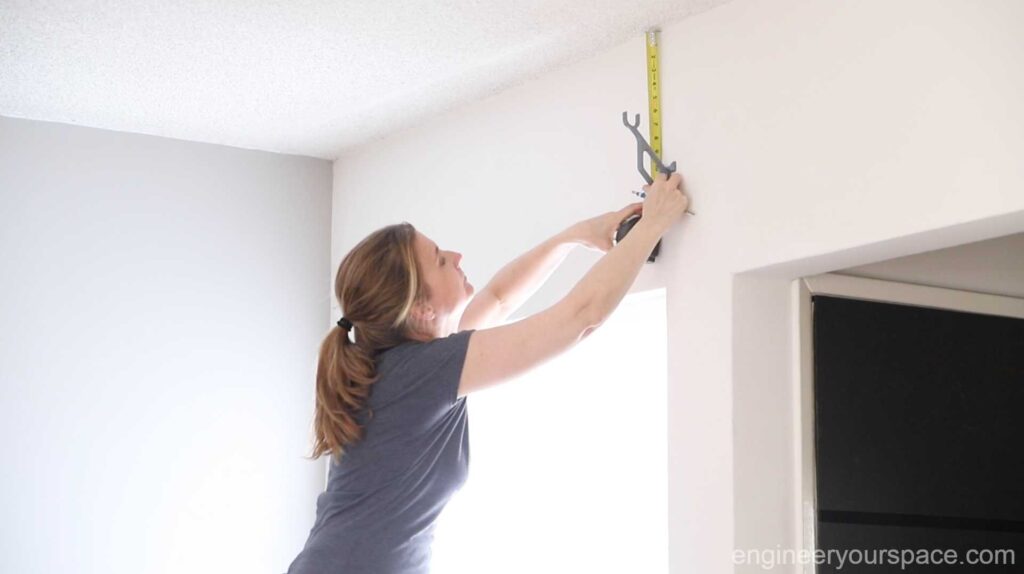
Before installing the curtain rod I had to remove the vertical blind track. Luckily, it was easy to snap out of the brackets. I didn’t want to make big holes in the wall to hang the curtain rod. I decided to try these strange looking brackets.
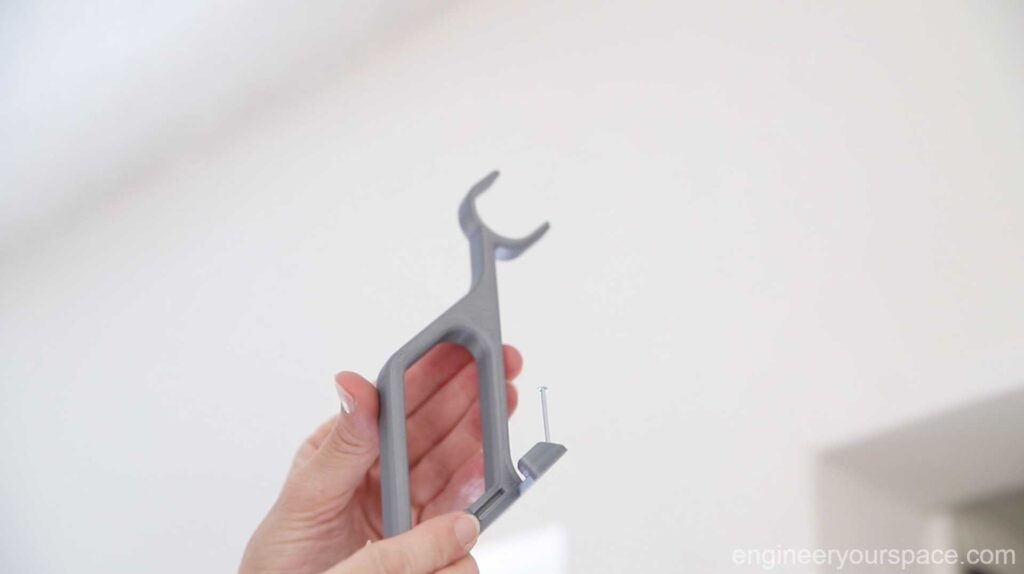
Their special design makes it possible to handle the weight of heavy curtains, even though they are secured to the wall with just two small nails. No need for anchors or screws. I placed them so that the rod would be about eight inches from the ceiling. How far apart you install the brackets really depends on your window. It is important for the brackets to be installed perfectly straight to work properly. The curtains I chose are a bit more see through than I would have liked and the brackets are somewhat visible. I may end up painting the brackets wide so that you don’t see them as much.
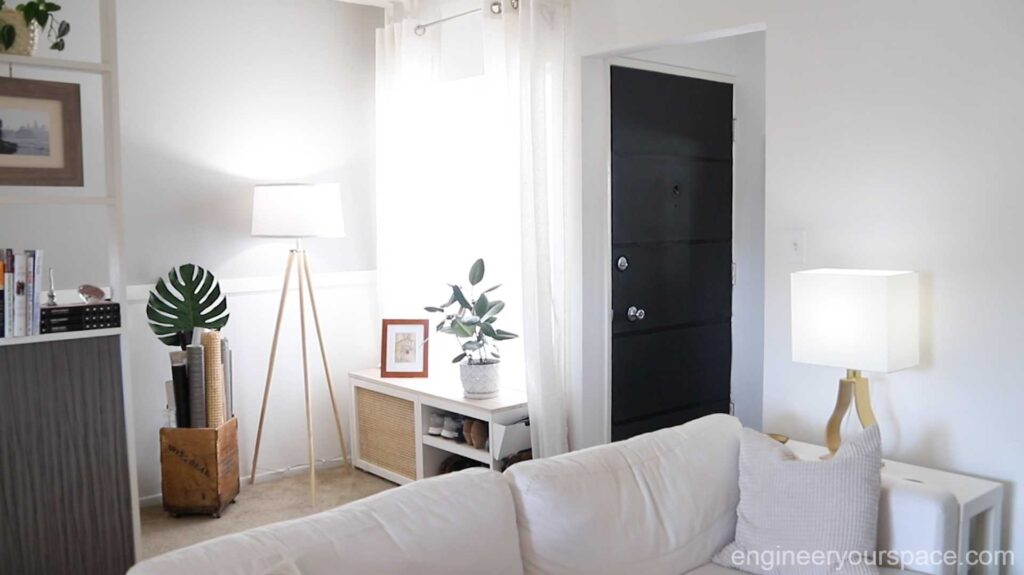
The last thing I did to this space was add a tripod lamp that I got from Amazon. Everything about this lamp needed to be assembled, including the shade. Putting it together isn’t difficult, but I find that shades that require assembly don’t look as nice as readymade ones. This particular shade had a really noticeable seam, the edges weren’t so great, plus I ended up making dents when I was handling it to build it. I do like the lamp overall. I’m going to keep it, but the one thing I don’t like is the cord hanging in the middle of the base. To hide it, I used this reusable removable double-sided tape called nano tape or alien tape. I simply put a few strips of the tape on the side of the leg and then stuck the cord to it. It’s a small thing but making that cord disappear is really satisfying.

I’m so happy I finally took the time to give some love to this neglected corner of my apartment. Now I get to enjoy a much nicer view from every angle. I especially love the black door, It’s the perfect complement to the floor and my DIY coat rack.
That was another fun project that I did recently where I incorporated lighting to brighten up the entryway. You’ll find the link to this and all the other projects I mentioned plus info on all the products that I use in the video description below.
Would love to connect on Instagram with you. It’s where I share what I’m up to day to day. So hopefully we’ll connect there. Thanks for watching, and I’ll see you next time.


0 Comments