 The gap measured 6″ so I chose 1×6″ pine boards since they are actually 5.5″ wide. I had all my lumber cut at the hardware store to make this project got faster.
 I used a speed square to mark the location of the shelves on both side boards at the same time to make sure they were lined up.
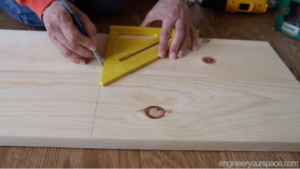
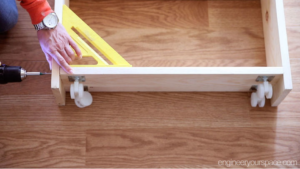 I started putting the cabinet together by putting on the casters on the bottom of a shelf and then attaching it to the side boards – I wanted to reused casters that I already had and they work fine but ideally you would want to use wheels that don’t swivel for a project like this since the wheels only need to roll in one direction. I attached all the remaining shelves, lines up with the marks I had made earlier.
 For the rails, you can use dowels but I wanted a different look so I used 1/4″ screen molding that I attached to the sides with small corner brackets. A bit more work but I prefer that look.
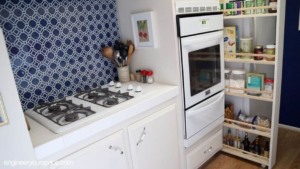 I’m very happy with the end result and I’m also quite impressed with the amount of stuff that can fit in such a narrow space! It does need to stay supported on either side because it is so tall and narrow so I used a small hook on the side of the cabinet to prevent it from coming out all the way. You can see how I did that, as well as a lot more details on this project in this video. Hope you like this project and let me know in the comments if this is something you would do.


Thank You for the video and this article. I found this on YouTube and decided to make this for my apartment Kitchen. It turned out beautifully and took about 1.5 hrs. All of my friends are soooo jealous. I made a 3 tier cart and it stores a ton of items.
That’s great to hear! Would love to see pics of it if you are open to sharing!