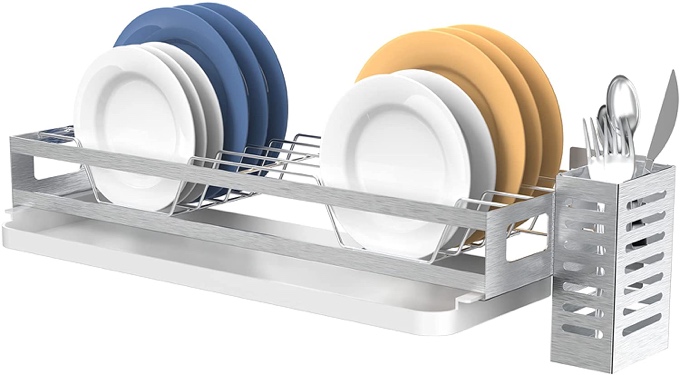
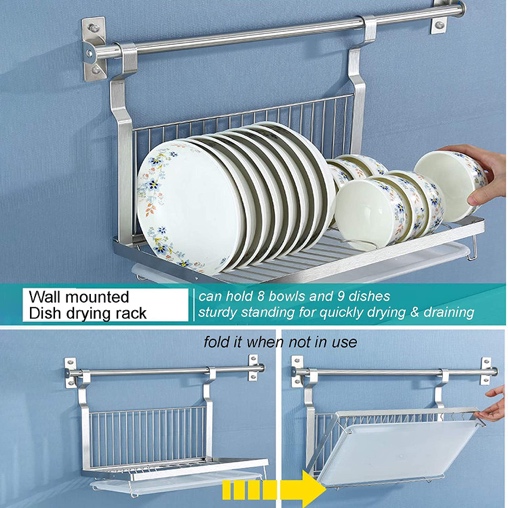
Do you have a small kitchen? If you do, you understand how precious counter space is, especially when it’s time to do the dishes and you have to set them down to dry on the counter – it leaves very little room for anything else.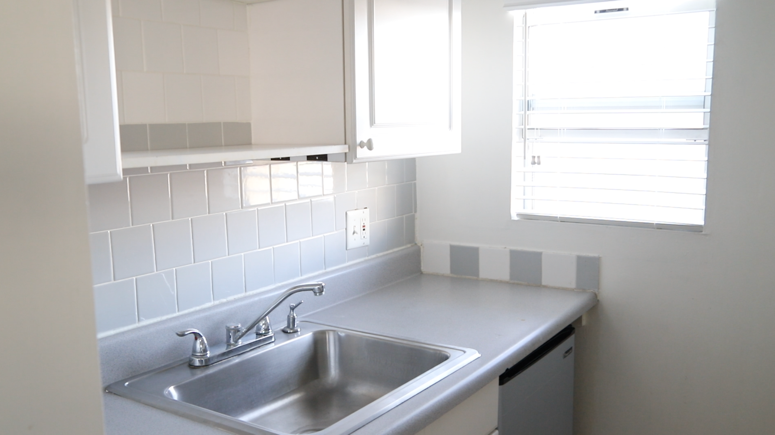 This particular kitchen is only 25 ft2 and barely any counter space, so when I realized that the shelf above the sink was only attached with brackets and a couple of screws, I got the idea to swap it out for a dish rack. Since it would be above the sink, all the water could drain directly into the sink. I looked online for some ready-made ones, but nothing was exactly the right size and most of the dish racks needed to be secured to the wall.
 So I looked around at some of my supplies and materials and came up with a design I could make with some scrap wood I had on hand, small wood dowels and bamboo plate racks. I bought the bamboo plate racks on Amazon, and they come unassembled.
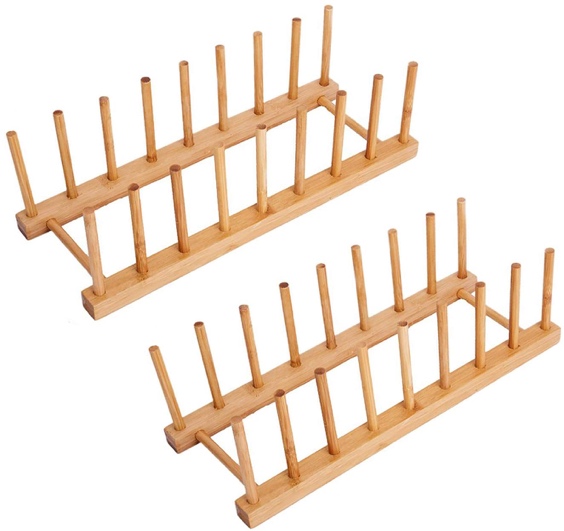
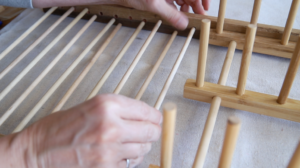
 Step 1: instead of putting the 2 side rails together to make the plate rack, I drill out the holes all the way through 3 of the 4 rails. It’s important to use strong clamps to make sure all 3 rails stay aligned. I put them aside
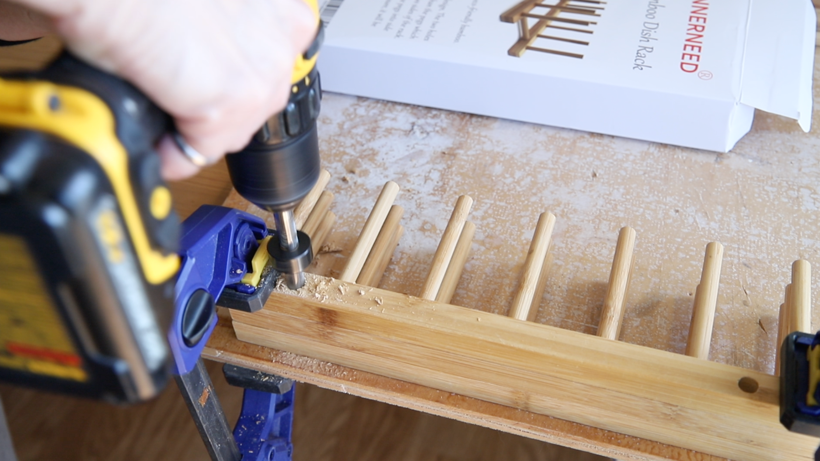
Step 2: to make the frame, I used 1”x2” cedar boards that I cut into 4 pieces to fit the space of the shelf. The longer side pieces will be attached together with the small wood dowels (1/4″ diameter) and 2 larger dowels that go through the plate rack rails. It’s very important that the holes for the dowels are exactly lined up on each side – using a speed square helps to make sure everything lines up.
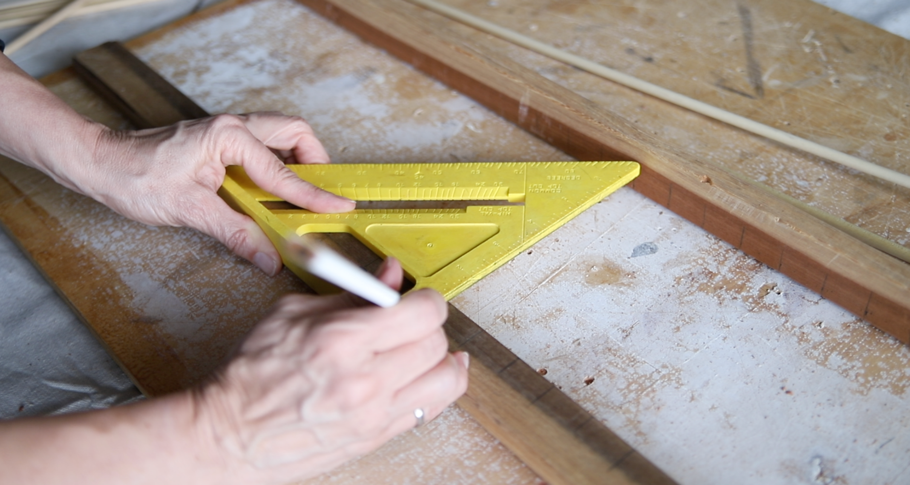 Then used a small drill bit start the hole and then moved to a larger drill bit – it’s an extra step but it this helps with accuracy. I also put painter’s tape around the drill bit to mark the depth since you don’t want to drill all the way through.
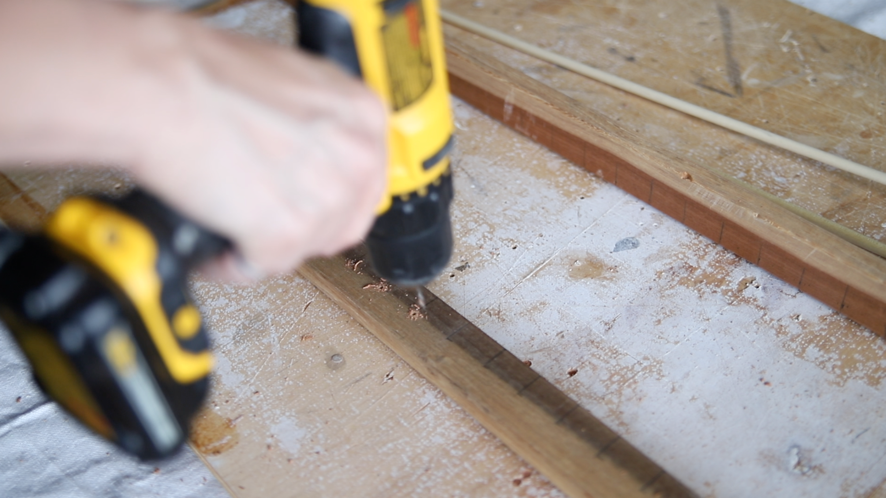
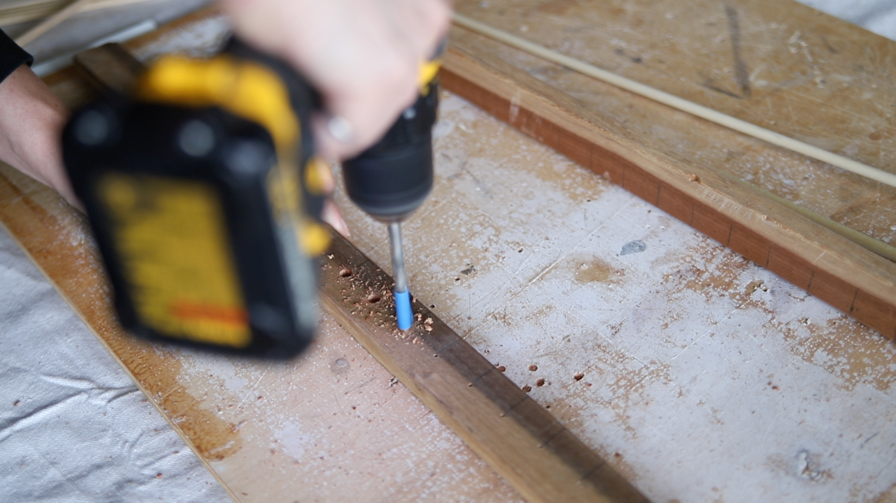 For the larger dowels, I needed to drill holes all the way through.
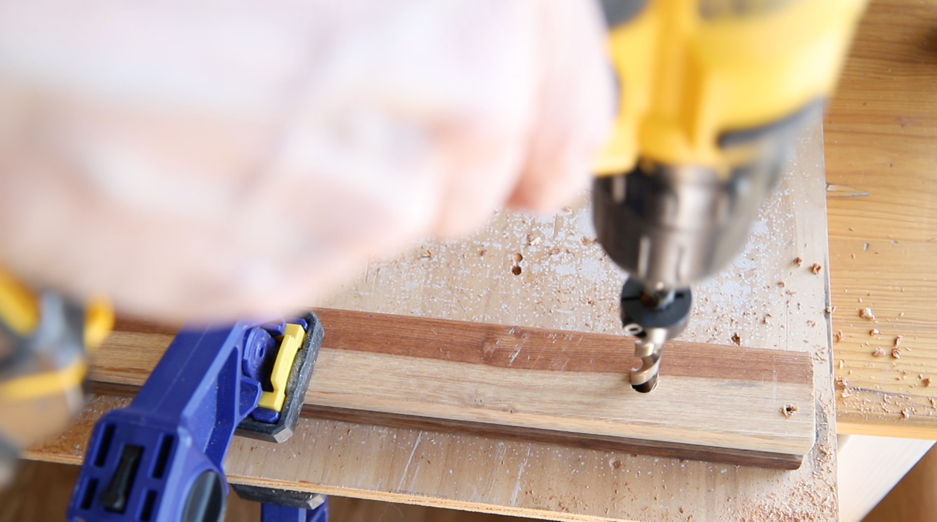 Step 3: Cut wood dowels to be slightly longer (about ½”) than the distance between the 2 wood pieces. Using a miter box helps to keep the dowels in place while sawing.
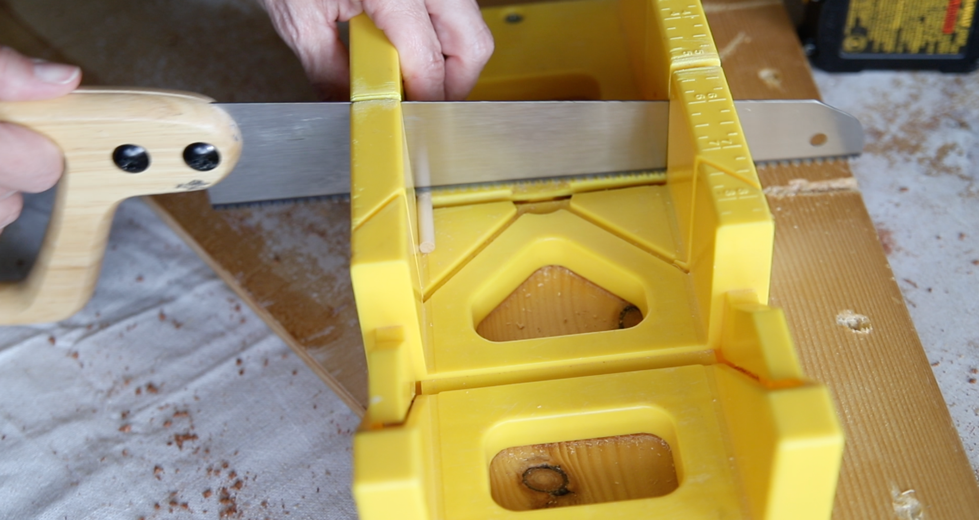
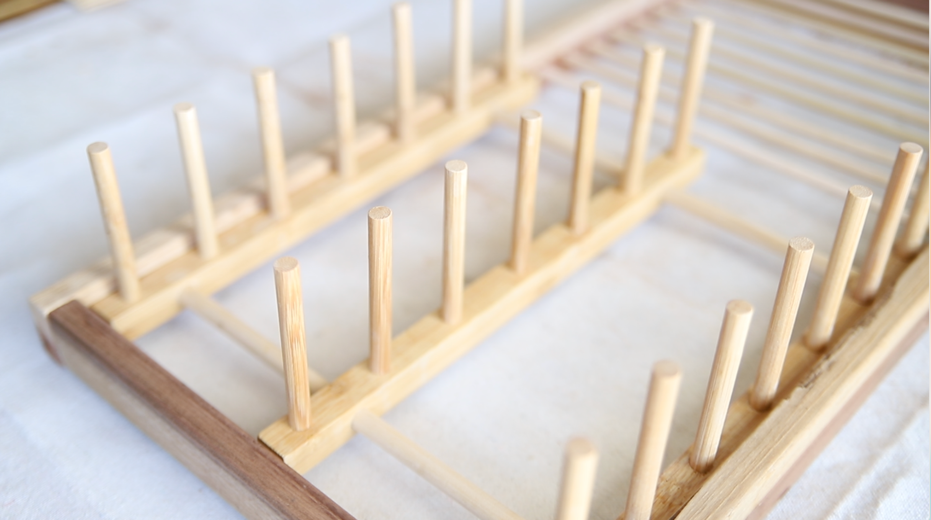
Step 4: I slid the plate rack rails onto the large dowels first spacing them out evenly, and then lined up the smaller dowels. I dipped the ends into wood glue before doing this. Lining up the dowels on both sides was the trickiest part of this whole project – it took a lot of patience!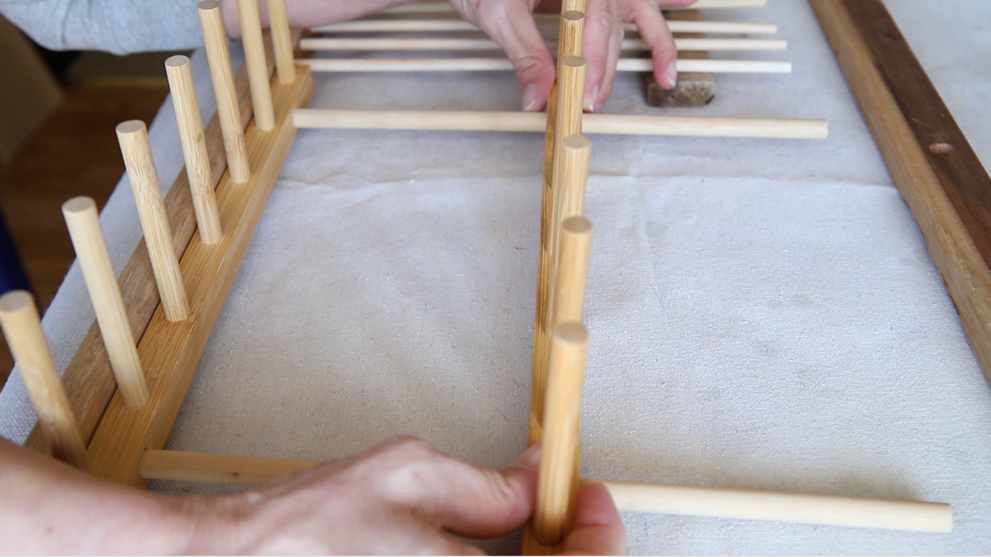
 Step 5: Once all the dowels were in, I put in the end 1”x2” ‘s and screwed them together.
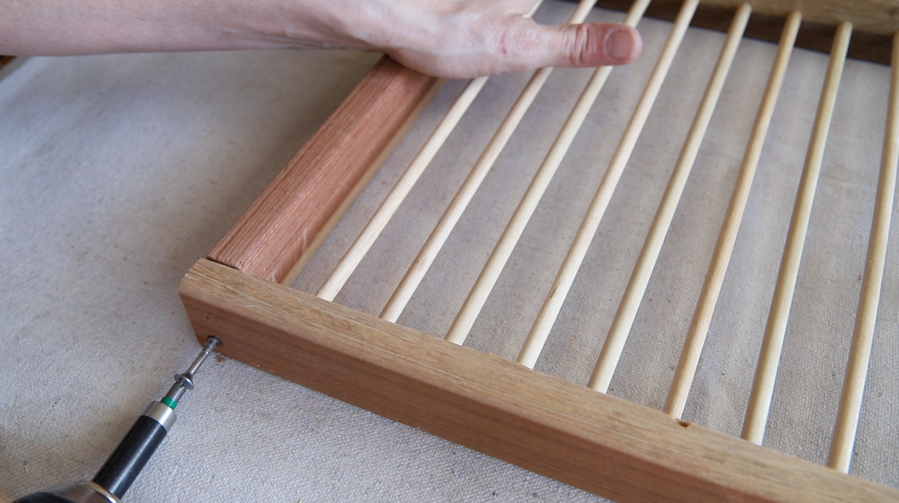
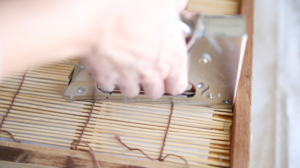
 Step 6: I didn’t want any dishes to fall through the opening between the plate racks so, especially utensils, so I added a piece of a bamboo shade ( I had it on hand and wasn’t using it so I didn’t mind cutting it for this project). To do this, I flipped the dish rack upside down, and used a staple gun to staple the bamboo shade in place along the sides.
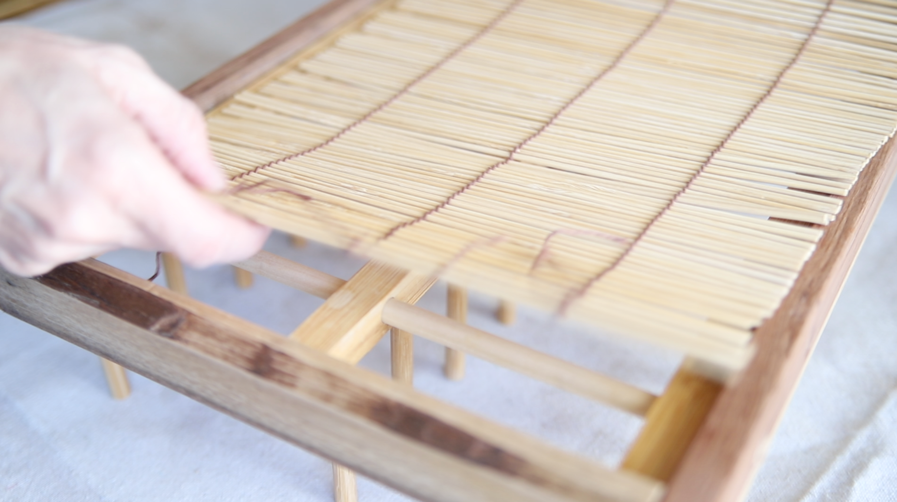
 Step 7: To hide the staples, I used some screen molding that I glued in place with wood glue
 Step 8: I used silicone to seal around the edges to prevent water from getting in the cervices.
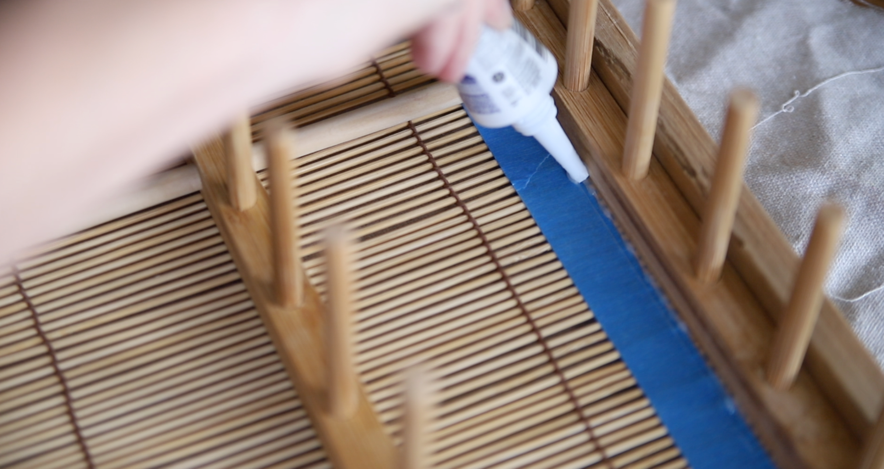 Step 9: Last but not least, I used polyurethane to seal all the wood.
 Installing the dish rack was simple – I secured the dish rack to the cabinet using the existing brackets. It will be simple to remove when moving out and put back the shelf.
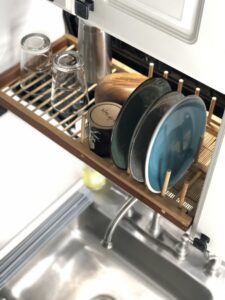
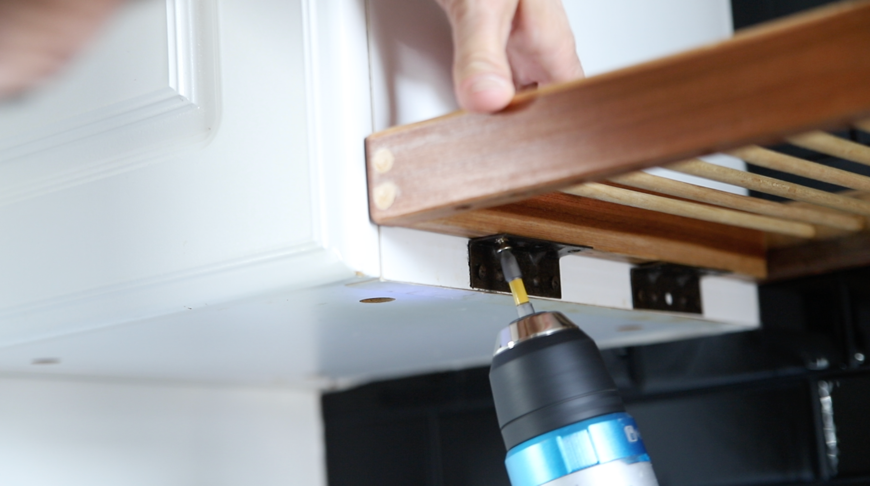
The end result was even better than expected – it was a game changer for this tiny kitchen and made it way more functional by freeing up much needed counter space. I also added some under cabinet lighting to brighten up the space above the sink.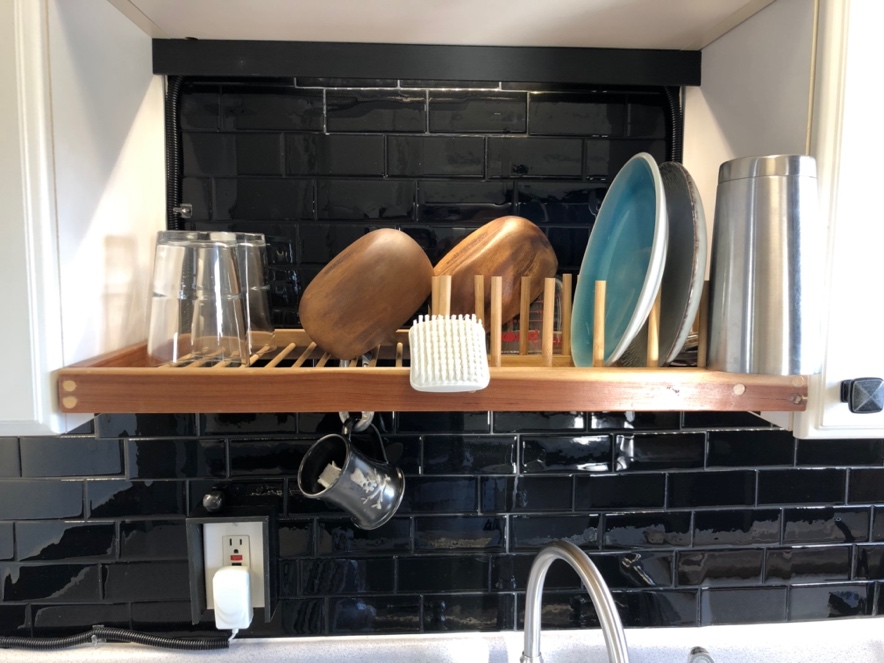
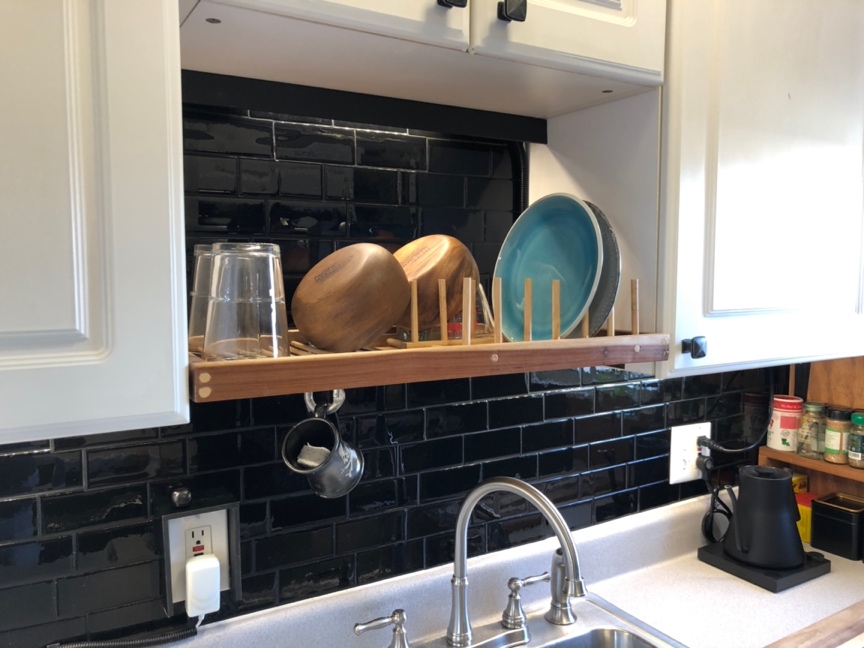 You notice that the backsplash was changed as well. This was a very easy renter-friendly project that I did using peel and stick tiles – you can read all about that project here. These 2 projects are only 2 of 11 in this kitchen makeover – watch the entire transformation in this video if you’re looking for some inspiration for your less than perfect tiny rental kitchen.


0 Comments